You have finally mastered the art of the perfect DIY manicure—polished, glossy, and chip-free. But without the right tools, even the most expensive nail polish will fall short. A professional manicure kit isn‘t just about aesthetics; it’s about building a foundation of healthy, strong nails. This guide covers how to choose the right kit, how to use it step by step, the most common mistakes to avoid, and how to care for your nails after each session.
Why Choose a Professional Manicure Kit?
The gap between drugstore beauty products and professional‑grade ones is defined by quality, performance, and longevity. While drugstore tools may seem cheaper, professional tools deliver superior results and long‑term benefits. Professional‑grade tools are made from high‑quality materials, perform more effectively, and last far longer than mass‑market alternatives. Drugstore nail polishes often contain fillers or lower concentrations of active ingredients, whereas professional formulas are designed for real treatment results and safety. Investing in a quality manicure kit also promotes proper sterilisation and sharp, precision tools that won‘t fray or rust, so you can achieve that flawless salon finish without leaving your home.
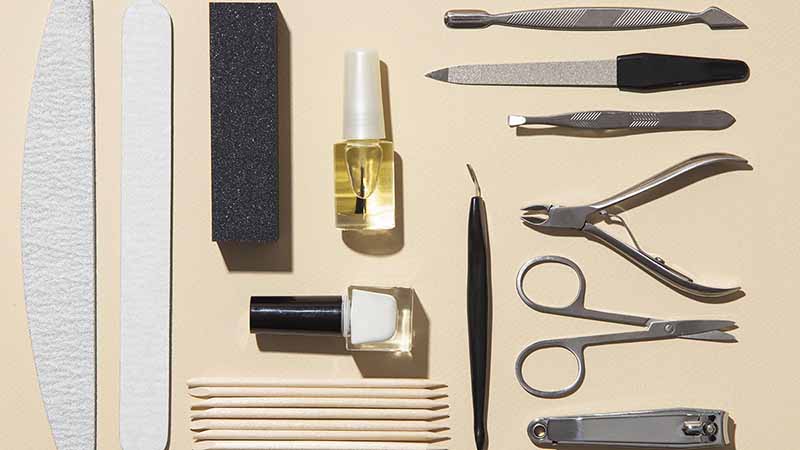
A professional kit typically contains stainless steel implements that are hypoallergenic, durable, and can be hygienically cleaned and sterilely sanitised. Stainless steel is popular for clippers and cuticle nippers because it resists rust, holds a sharp edge, and is easy to clean—critical features for anyone serious about nail health. Professional kits are designed for nail technicians and serious enthusiasts, offering precision for shaping, cuticle care, and detailed nail art that works equally well on natural and artificial nails. Whether you are a professional or a home user, a well‑made kit is an investment that will serve you for years.
A Step‑by‑Step Practical Guide to the Perfect Manicure
With the right tools at hand, proper technique is what delivers salon‑quality results. Follow these steps to achieve a flawless finish every time.
Step 1: Preparation is key. Start by washing your hands thoroughly with soap and water to remove any dirt and oils. Set up a clean, well‑lit workspace and lay out all your tools. Remove any old polish using a gentle, acetone‑free nail polish remover with cotton pads, making sure to wipe along the edges and under the nail tip.
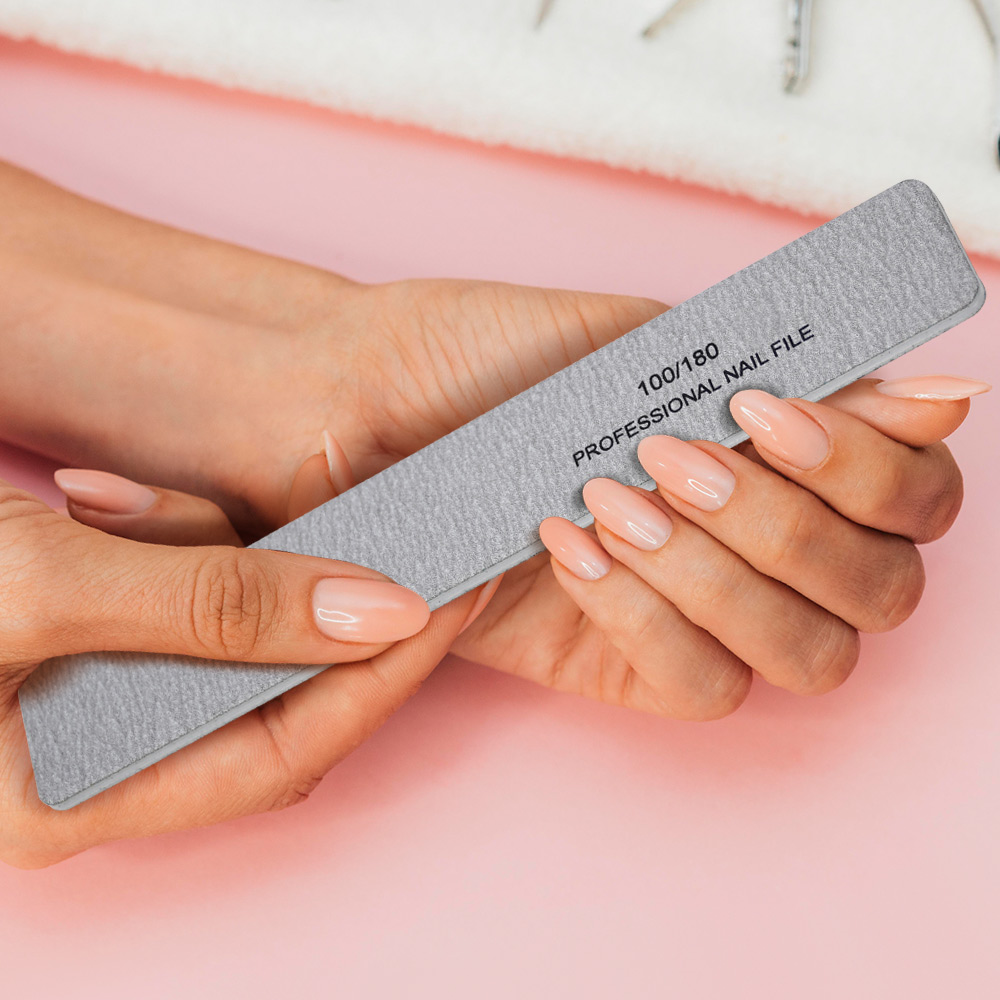
Step 2: Trim and shape your nails. Use sharp stainless steel nail clippers to trim your nails to your desired length, following the natural shape of your nail bed. For filing, use a fine‑grit nail file and always file in one direction—sawing back and forth creates micro‑tears that lead to peeling and weak nails. Smooth the edges gently to prevent snags.
Step 3: Soak and soften. Fill a small bowl with warm water and add a few drops of gentle hand soap or essential oil. Soak your nails for about five minutes to soften the cuticles, making them easier to manage.
Step 4: Push back and trim cuticles. Gently dry your hands and use a cuticle pusher to push back your cuticles. Be careful not to push too hard, as this can damage the nail bed. If you have excess, dead cuticle skin, use sharp cuticle nippers to trim it away. Only trim the dead, loose skin—cutting live cuticle can lead to infection, and healthy cuticles act as a protective barrier for the nail matrix. If you are not sure, it is safer to simply push them back and leave the nippers aside.
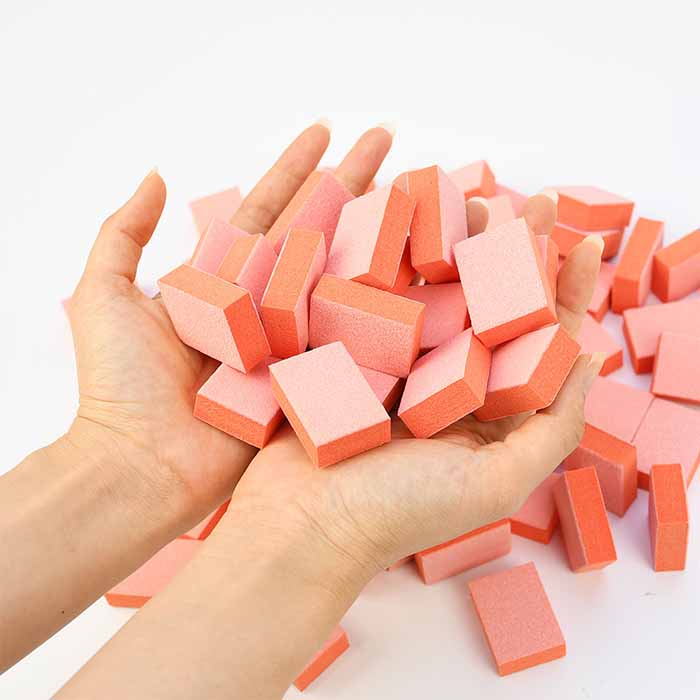
Step 5: Buff for a smooth surface. Use a nail buffer to gently buff the surface of each nail. Buffing removes ridges and creates a smooth canvas for polish to adhere to. Do not over‑buff—too much buffing can thin out your nails and make them weak.
Step 6: Hydrate your cuticles. Apply cuticle oil to each nail and gently massage it in. This essential step keeps your cuticles healthy, prevents hangnails, and promotes strong nail growth.
Step 7: Polish with precision. Before applying polish, clean your nails with a bit of nail polish remover to remove any remaining oils. Apply a thin layer of base coat to protect your nails from staining and to help the polish adhere. Skipping the base coat is a common mistake that can cause long‑term discolouration and shorten the life of your manicure. Once the base coat is dry, apply your chosen nail polish in thin, even layers. Apply two to three thin coats rather than one thick coat—thin coats dry faster and chip far less easily. Allow each coat to dry thoroughly before applying the next. Finish with a top coat to seal in the colour, add shine, and prevent chipping. A good top coat can extend the life of your manicure significantly.
Common Mistakes to Avoid When Using Your Manicure Kit
Even with the right tools, certain habits can quietly sabotage your results and damage your nails.
Over‑cutting cuticles. This is the most common and damaging error. Cutting too much cuticle compromises the nail‘s natural protective seal, leaving it vulnerable to infection and irregular growth. Push cuticles back gently; only trim loose, dead skin that is clearly detached. If in doubt, leave the nippers in the drawer.
Sawing back and forth when filing. Filing in both directions creates microscopic fractures in the nail layers, which travel up the nail as it grows and cause splitting, peeling, and weakness. Always file in one direction, from the outer edge toward the centre.
Skipping the base coat. A base coat is not optional. It protects your nails from staining, helps polish adhere, and creates a smooth, even surface for colour. Without it, dark polishes can leave yellow stains that take months to grow out, and your manicure will chip far sooner.
Neglecting tool hygiene. Nail clippers, cuticle pushers, and nippers accumulate debris, skin cells, and bacteria. After each use, wash them with warm water and soap, dry thoroughly, then disinfect with rubbing alcohol or an EPA‑registered disinfectant. Store them in a clean, dry pouch. Unclean tools are a direct route to infections.
Over‑filing or over‑buffing. Aggressive filing or heavy buffing removes layers of the nail plate, leaving nails thin, bendy, and weak. Use gentle pressure and a fine‑grit file on natural nails. Buffing should be kept to a minimum—just enough to smooth ridges, not to thin the nail.
Picking at gels or cuticles. Peeling off gel polish or tugging at cuticles weakens the nail surface and leaves the surrounding skin vulnerable to infection. Cuticles exist to protect the nail bed—treat them gently and resist the urge to pick.
Maintenance and Removal Tips for Long‑Lasting Results
A beautiful manicure deserves to last, and the right aftercare and removal habits make that possible.
Apply cuticle oil daily. Cuticle oil hydrates deeper than hand creams, and the massaging motion helps stimulate circulation and promote nail growth. Apply a small drop to each cuticle and massage it in, especially at night when the oil has time to absorb.
Wear gloves for chores. Dishwashing, cleaning, and gardening expose your manicure to harsh chemicals and prolonged water exposure. Water causes the nail plate to swell and then shrink as it dries, weakening the bond between polish layers and leading to chips. A simple pair of rubber gloves protects both your polish and your natural nails.
Avoid using your nails as tools. Opening cans, peeling stickers, or scraping labels with your nails creates lateral pressure that chips polish and damages the nail plate. Keep a small tool nearby—your nails are for beauty, not multitasking.
Reapply top coat every few days. A fresh thin layer of top coat refreshes shine, seals the edges, and can add 3–5 days of wear to your manicure.
When removing gel or hard polish, be patient. Never pick or peel—this strips layers off your natural nail and leaves them thin and painful. To remove gel polish safely: gently file off the shiny top coat to break the seal. Saturate a cotton ball with 100% pure acetone and place it on each nail. Wrap the fingertip tightly with a small square of aluminium foil. Wait 10–15 minutes, then gently push the softened product off using a wooden cuticle stick. Do not force or scrape—if the gel resists, rewrap and wait another 5 minutes. After removal, always wash your hands and apply cuticle oil generously to rehydrate.
How to Choose the Right Manicure Kit
Selecting the right kit depends on your skill level and specific needs. For beginners, a basic stainless steel kit with clippers, a glass or fine‑grit file, a buffer, a cuticle pusher, and a nipper is a great starting point. Focus on learning proper sanitation, gentle handling, and safe cuticle care before expanding your collection. For experienced users and professionals, a full set of high‑quality stainless steel instruments—including multiple clippers, detailed cuticle scissors, and a variety of files and buffers—offers the precision and durability needed for advanced techniques. Kits with ergonomic handles reduce hand fatigue during longer sessions. Always prefer materials labelled stainless steel or surgical stainless. Avoid tools with painted or cheap metal coatings—they rust quickly, dull faster, and cannot be properly sanitised. Reading reviews and checking for well‑aligned, sharp blades will help you avoid low‑quality products.
Ultimately, a quality manicure kit is an investment in the health and beauty of your natural nails. With sharp, well‑made tools, correct technique, and consistent aftercare, you can achieve salon‑worthy results from the comfort of your home—without the recurring expense of professional appointments.
Read also: Nail Growth: Understanding, Caring, and Accelerating
[…] Read also: The Guide to Professional Manicure Kits: Why They Matter and How to Use Them […]