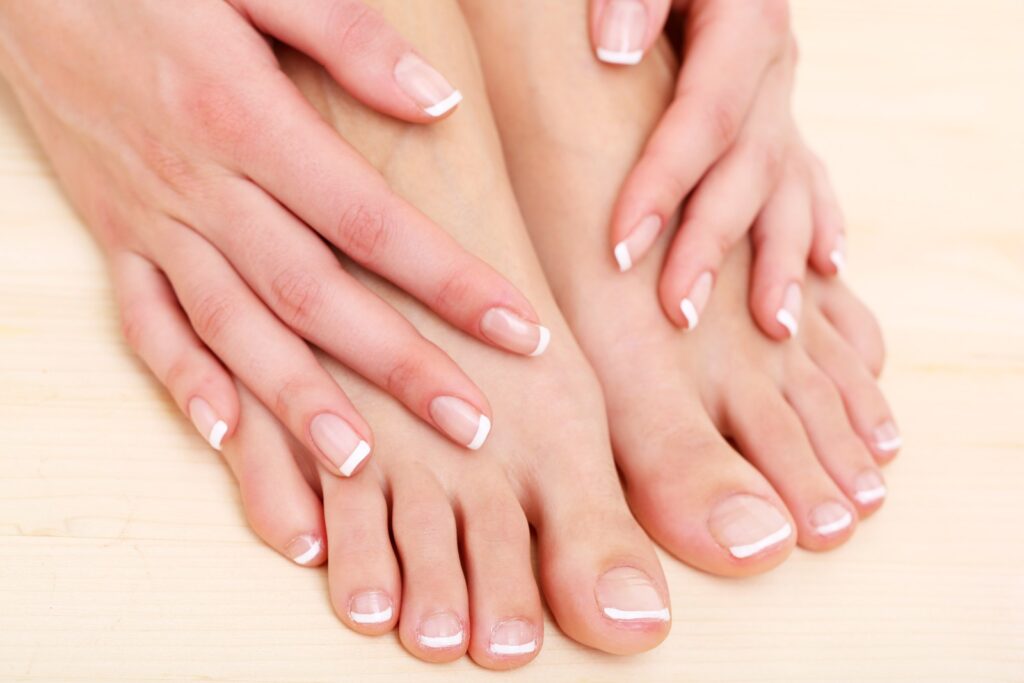
In the world of nail aesthetics, the French pedicure stands as a timeless icon. Synonymous with clean, classic, and understated elegance, it transcends fleeting trends. But in an era of self-expression, how do you make this classic your own? The answer lies in mastering the technique, understanding the tools, and embracing creative twists that allow your feet to tell a unique story.
Making Your Feet Stand Out: The Foundation
Before any polish touches your nails, the canvas must be prepared. Distinctive feet are healthy, well-groomed feet. Start with a soothing foot soak in warm water with Epsom salts or a few drops of essential oil to soften the skin and cuticles. Follow with meticulous exfoliation using a foot scrub or pumice stone to smooth rough patches, especially on heels. Gently push back cuticles and trim nails straight across to prevent ingrowth—the ideal shape for the French style is a soft square or squoval. Finally, hydrate deeply with a rich foot cream and massage it in. This ritual not only ensures a flawless application but turns foot care into a luxurious act of self-care, making your feet truly exceptional from the ground up.
The Essential Toolkit: Products for a Perfect French Pedicure
Achieving a crisp, professional-looking French pedicure at home requires a few key products:
1. Base Coat: The non-negotiable first layer that protects nails from staining and helps polish adhere.
2. Sheer Nude or Pink Polish: The classic base. Opt for a shade that complements your skin tone—pale pinks for fair skin, beige or rosy nudes for medium tones, and warmer caramel nudes for deeper skin.
3. White Nail Polish or Art Pen: For the iconic white tip. A specialized French manicure white polish often has a slightly thicker, more opaque formula for easier application. A fine-tipped nail art brush or pen offers superior control.
4. Top Coat: A high-gloss, quick-drying top coat seals the design, adds shine, and prevents chipping.
5. Guide Strips (Optional): Adhesive French tip guides can be helpful for beginners to create a straight, even line.
6. Correcting Tool & Clean-up Brush: A small angled brush dipped in nail polish remover is essential for cleaning up any smudges and achieving sharp, clean lines.

The Classic Technique: How to Achieve the Signature Look
The magic of the pedicure kit is in its precise execution. Follow these steps for a flawless finish:
1. Prep & Base: After grooming, apply a thin layer of base coat. Let it dry completely.
2. Apply the Base Color: Apply two thin coats of your chosen sheer nude or pink polish, allowing each coat to dry thoroughly. Thin layers prevent bubbling and ensure faster drying.
3. Create the White Tip: This is the defining step. If using guides, place them at the tip of each nail, following its natural curve. Using your white polish or pen, carefully paint the free edge. If doing it freehand, steady your hand on a table and use three confident strokes: one down the center and one along each side. Wait for the white to become completely dry to the touch.
4. Seal with Shine: Apply a generous layer of glossy top coat over the entire nail. This blends the layers, smooths the ridge between colors, and provides a durable, salon-quality finish.
5. The Clean-Up: Dip a small brush in remover and carefully trace around your cuticles and skin to remove any polish mistakes. This final step is what gives a truly polished, professional look.
Beyond the Classic: Creative Designs for Every Personality
The true joy of the modern French pedicure is its versatility. Once you master the classic, you can experiment with endless creative variations:
- Color Reversal (Reverse French): Flip the script! Paint the nail bed a soft white and add a nude, pink, or even a bold color along the cuticle line.
- The Pop of Color: Keep the nude base and classic white tip, but add a thin stripe of a vibrant color—electric blue, metallic gold, or fiery red—between them for a subtle yet striking detail.
- Glitter & Metallics: Replace the white tip with a glittery silver or gold. Alternatively, just add a delicate line of glitter along the smile line (where the white meets the nude).
- The Nude Ombré: Create a gradient effect using two similar nude shades, with the darker one at the tip instead of white, for a sophisticated, modern look.
- Graphic Lines: Use colored tips in geometric patterns—think diagonal lines, V-shapes (chevron), or even tiny polka dots over a sheer base.
- Floral & Minimalist Art: Adorn a single accent toe with a tiny hand-painted flower, a minimalist moon, or a delicate dot pattern over your classic French base.
Ultimately, the French pedicure is more than a style; it’s a celebration of neat, graceful beauty. It provides a perfect framework upon which to build your personal aesthetic, from the strictly classic to the playfully inventive. By caring for your feet, mastering the technique, and adding your creative signature, you turn a simple pedicure into a distinctive statement of elegance, one perfectly polished toe at a time.
Read also: How to strengthen your nails in daily life?